Eliminating Z Seam Artifacts in FDM 3D Printing
1. Case Study in Ultimaker Cura
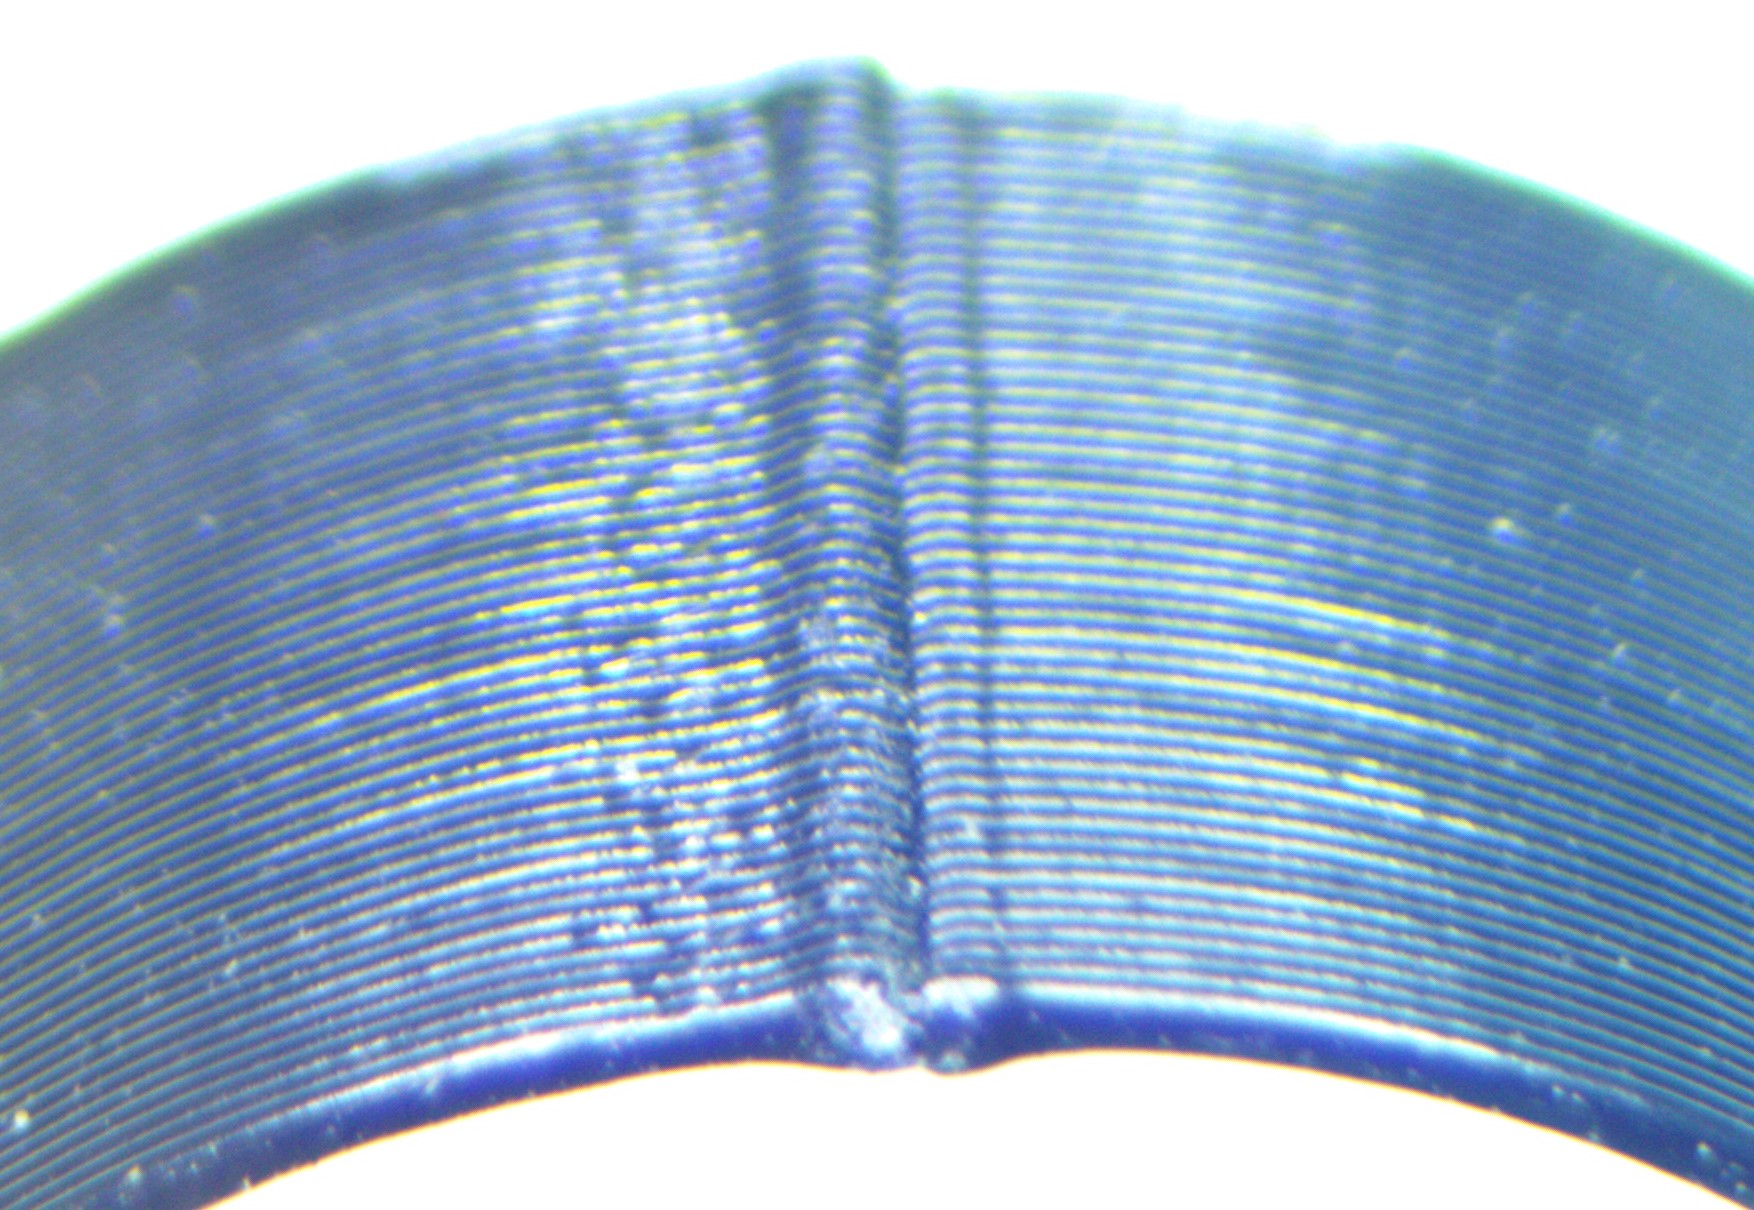
1.1 Understanding the Z Seam Issue
When printing cylindrical or similar structures using an FDM 3D printer, the nozzle cannot maintain continuous circular motion. Instead, it moves either clockwise or counterclockwise from a starting point, returning to that same position upon completing the circle. This process creates a visible seam along the print’s surface where each layer begins and ends, potentially affecting the mechanical properties of the final product, as illustrated below.
1.2 Managing Z Seam with Cura’s Alignment Settings
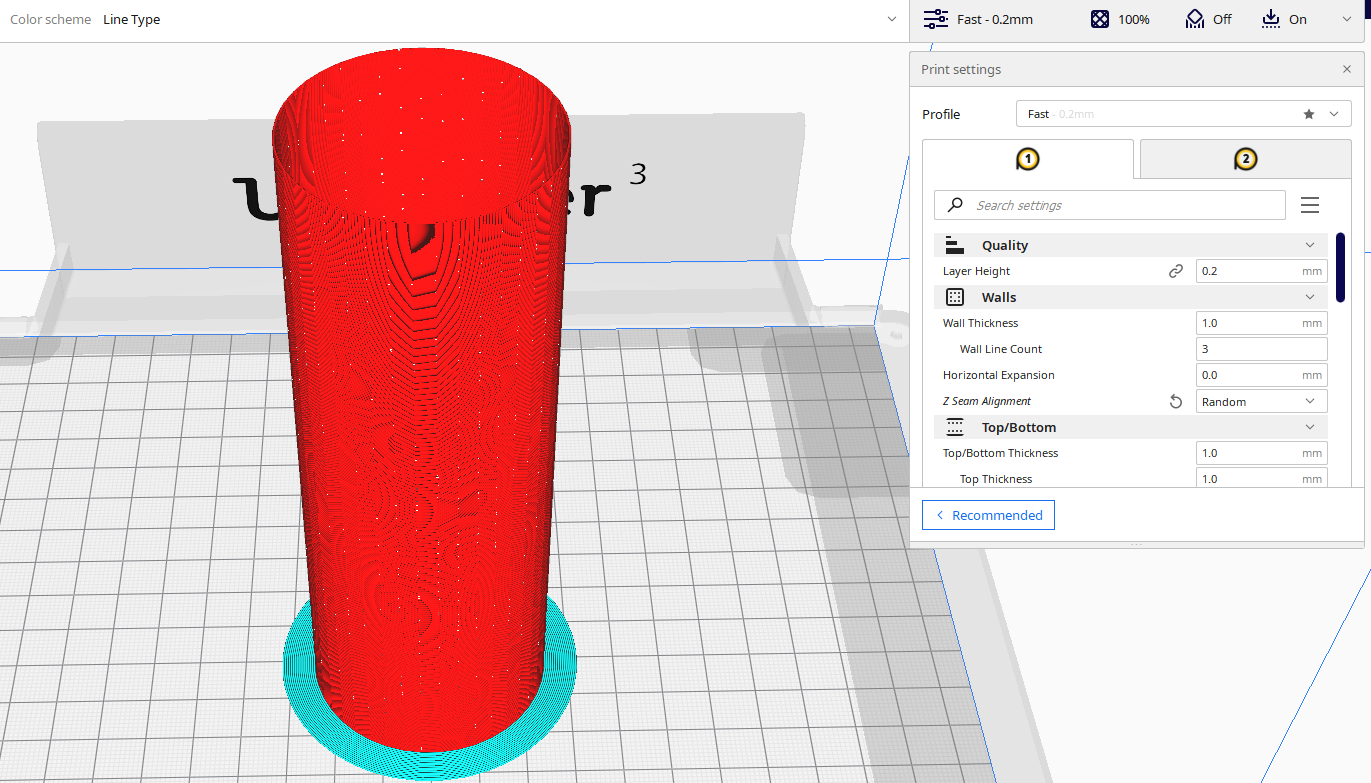
To address this issue, navigate to Cura’s Preference settings and locate the Wall section. Here, you’ll find the Z Seam Alignment option that needs to be enabled.

After enabling this feature, access the printing parameter settings and customize the Z Seam Alignment to Random. Upon slicing, you’ll observe that the Z seam positions are distributed randomly across the model’s surface.
2. Comprehensive Analysis
2.1 Understanding Z Seam Formation
The Z seam phenomenon is an inherent challenge in FDM printing technology. While layer transitions contribute significantly, they account for only about half of the issue. The primary cause stems from momentary nozzle pauses, during which excess material can accumulate at specific points. These pauses occur not only during layer changes but also when the nozzle traverses between different sections of the print.
The typical printing sequence follows this pattern:
internal perimeters --> external perimeter --> filling --> layer change
This sequence is designed with purpose - perimeters are printed first to create a containment structure for the infill material, ensuring proper adhesion and maintaining the model’s shape. The layer change occurs after completing the infill, which is the final element printed in each layer.
During printing, the nozzle performs retraction movements during transitions between perimeters and from perimeter to infill. These brief pauses contribute to seam formation, making them visible not just at layer changes but throughout the print. While complete elimination is challenging, certain techniques can minimize their appearance.
2.2 Z Seam Minimization Techniques
While vase mode (spiral printing) offers the most seamless results, several other methods can effectively reduce seam visibility:
2.2.1 Optimizing Retraction Parameters
Two critical retraction settings significantly impact seam visibility:
- Retraction Distance: Finding the optimal balance is crucial. Insufficient distance leads to material oozing, while excessive retraction risks hot end clogs.
- Retraction Speed: Must be fast enough to prevent material oozing but not so rapid that it causes filament grinding or step losses in the extruder motor.
2.2.2 E-steps Calibration
Proper extruder calibration is essential for minimizing seam visibility. Incorrect calibration, particularly over-extrusion, can create pressure buildup in the nozzle, compromising retraction effectiveness and resulting in more prominent seams.
2.2.3 Temperature Management
Optimal printing temperature is crucial for seam quality. Excessive temperatures can lead to material oozing and more visible seams. Use temperature towers to determine the ideal printing temperature for your specific filament.
2.2.4 Advanced Z Seam Control in Cura
Cura’s Z seam alignment feature offers sophisticated control over seam placement. Two particularly effective options are:
- Random: Distributes seam points randomly across layers, effectively disguising their presence despite slightly longer print times.
- Sharpest Corner: Strategically places seams in model corners, making them virtually invisible in the final print.
2.3 Final Thoughts
While completely eliminating Z seams in FDM printing remains impossible, implementing these optimization strategies can significantly reduce their visibility. The key lies in combining proper retraction settings, precise calibration, and strategic seam placement based on your model’s geometry rather than focusing solely on seam elimination.